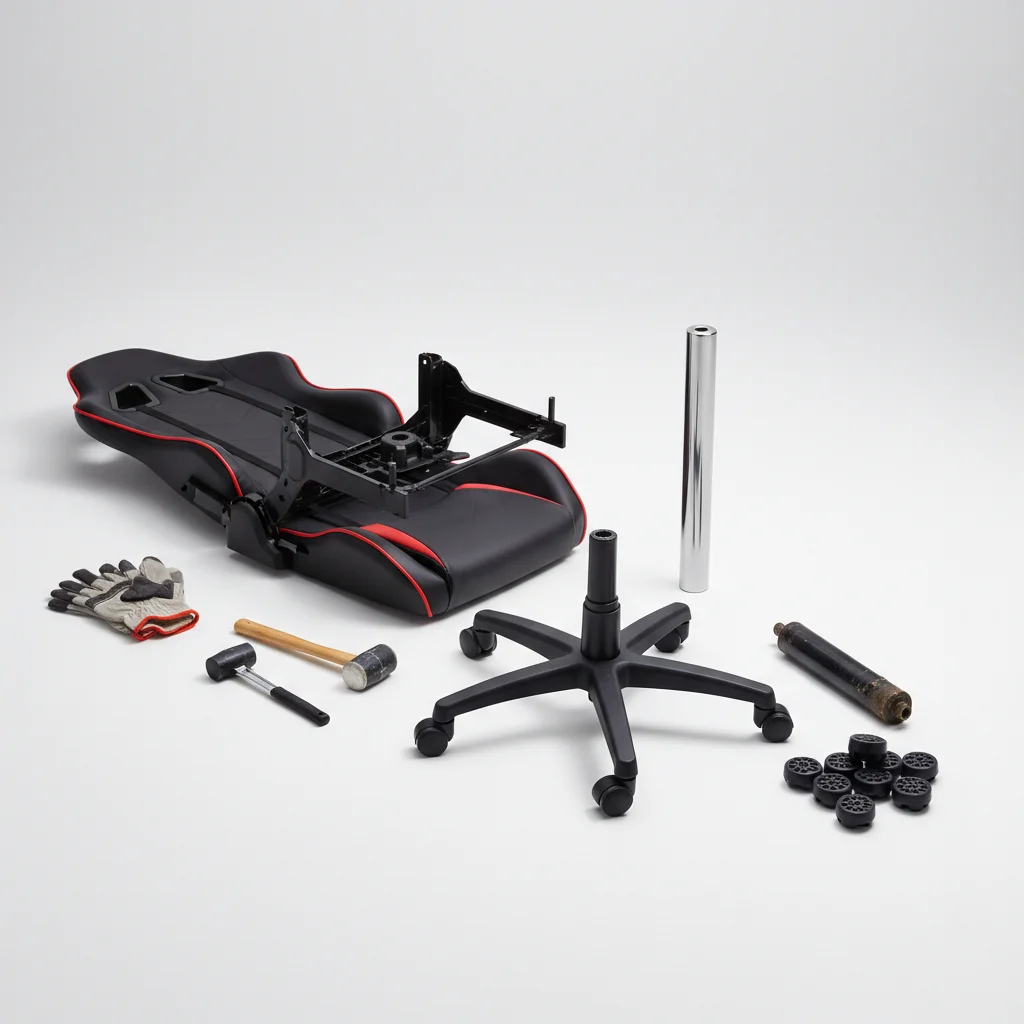
Replacing a gaming chair cylinder is a common repair that can significantly extend the life of your chair. This DIY guide will walk you through the process, which typically takes about 30-60 minutes, depending on your chair’s design and your experience level. You’ll need a few basic tools and a replacement cylinder to get started.
Why Replace Your Gaming Chair Cylinder?
The gas lift cylinder is the component responsible for adjusting your chair’s height. Over time, it can wear out, leading to a chair that slowly sinks, wobbles, or fails to hold its height. Replacing it is often more cost-effective than buying a new chair, especially if the rest of your chair is in good condition. Common signs of a failing cylinder include inconsistent height adjustments, a noticeable drop in height after sitting, or a complete inability to adjust the chair’s height. For expert gaming chairs reviews on this site.
Tools and Materials You’ll Need
Before you begin, gather the necessary tools. You will need a rubber mallet or hammer, a pipe wrench or monkey wrench, a flathead screwdriver, and possibly some penetrating oil (like WD-40) if the cylinder is seized. Of course, the most important item is a new replacement gas lift cylinder, ensuring it matches the class and dimensions of your original one for proper fit and function.
Step-by-Step Replacement Process
First, turn your gaming chair upside down to expose the base and cylinder. Use a flathead screwdriver to carefully pry off the plastic cover that sits over the top of the cylinder where it connects to the seat mechanism. Next, you’ll need to separate the chair’s seat from the cylinder. This often involves hitting the top of the cylinder with a rubber mallet while holding the seat base steady, or in some cases, unscrewing bolts that secure the mechanism to the cylinder. Be patient, as this part can sometimes require a bit of force.
Once the seat is detached, focus on removing the cylinder from the chair’s five-star base. This is where the pipe wrench comes in handy. Grip the cylinder firmly with the wrench and twist it counter-clockwise to loosen it from the base. If it’s stuck, apply some penetrating oil around the connection point and let it sit for a few minutes before trying again. Once loose, pull the old cylinder out of the base.
- Turn the chair upside down.
- Remove the plastic cylinder cover.
- Separate the seat from the old cylinder.
- Remove the old cylinder from the chair base.
- Insert the new cylinder into the chair base.
- Reattach the seat to the new cylinder.
Installing Your New Gaming Chair Cylinder
|
Our Picks for the Best Gaming Chair in 2026
As an Amazon Associate I earn from qualifying purchases.
|
||
| Num | Product | Action |
|---|---|---|
| 1 | BestOffice High-Back Gaming Chair PC Office Chair Computer Racing Chair PU Desk Task Chair Ergonomic Executive Swivel Rolling Chair with Lumbar Support for Back Pain Women, Men,White |

|
| 2 | BestOffice High-Back Gaming Chair PC Office Chair Computer Racing Chair PU Desk Task Chair Ergonomic Executive Swivel Rolling Chair with Lumbar Support for Back Pain Women, Men,Blue |
|
| 3 | Gaming Chair with Footrest for Adults - Ergonomic Gaming Chairs with Foot Rest - Big and Tall Computer Game Chair - Fabric Reclining Video Game Chairs with Spring Cushion - Blue/Light Grey |
|
| 4 | Gaming Chair with Footrest, Ergonomic Fabric Computer Chair with Lumbar Support, High Back Reclining Office Chair with Adjustable Height & Angle, 300KG Capacity (Grey Linen) |
|
| 5 | Gaming Chair, High Back Fabric Computer Chair with Pocketed Spring Cushion and Footrest, Height Adjustable Game Chair with Headrest and Lumbar Support (Beige & Green) |
|
| 6 | Fabric Gaming Chair, Skin-Friendly and Breathable, Manufactured by A Reputable Manufacturer, Safe and Stable, Specially Designed for Gaming.with Footrest Mg(1005-LightBlue) |
|
| 7 | Ergonomic Gaming Chair, Video Game Chair with Pocket Spring Cushion and Footrest, Height Adjustable Computer Chair with Swivel Seat and Headrest (Purple) |
|
| 8 | White Gaming Chair,Ergonomic Massage Computer Office Desk Chair with Footrest,Pocket Spring Cushion,Reclining Leather Adjustable Gamer Chair with Headrest and Lumbar Support,White |
|
| 9 | Gaming Chair with Footrest for Adults - Ergonomic Gaming Chairs with Foot Rest - Big and Tall Computer Game Chair - PU Leather Reclining Video Game Chairs with Spring Cushion - Black/Light Blue |
|
| 10 | Gaming Chair Office Chair Desk Chair Ergonomic Executive Swivel Rolling Computer Chair with Lumbar Support, Pink |
|
With the old cylinder removed, it’s time to install the new one. Simply insert the narrow end of the new gas lift cylinder into the hole in the center of your chair’s five-star base. It should slide in easily and sit securely. Then, carefully align the seat mechanism with the top of the new cylinder and press down firmly. The weight of the chair and your body will help to seat the cylinder properly. Test the height adjustment to ensure everything is working correctly.
Tips for a Smooth Replacement
Always wear gloves to protect your hands, especially when dealing with potentially greasy or sharp edges. If the cylinder is particularly stubborn, a little heat from a hairdryer applied to the metal connections can sometimes help expand the metal and loosen the grip. When purchasing a replacement cylinder, pay attention to its class (e.g., Class 2, Class 3, Class 4) and dimensions to ensure compatibility with your specific gaming chair model. A higher class generally indicates greater durability and weight capacity.
Get our weekly buyer guide
Practical specs, not advice. Unsubscribe anytime.
